Creating captivating portraits doesn’t always require complex lighting setups. In fact, with a simple 1-light setup, you can achieve professional-quality results that highlight your subject’s features and evoke the desired mood. In this blog post, we’ll guide you through the steps to light a portrait like a pro using a single light source. So, let’s dive in and unlock the secrets to stunningly lit portraits!
- Choose the Right Light Source: Selecting the appropriate light source is crucial for achieving desired results. A popular choice is a softbox or a large umbrella as they produce soft, diffused light that flatters the subject. Place it slightly off-center and angled towards the subject for pleasing and even illumination.
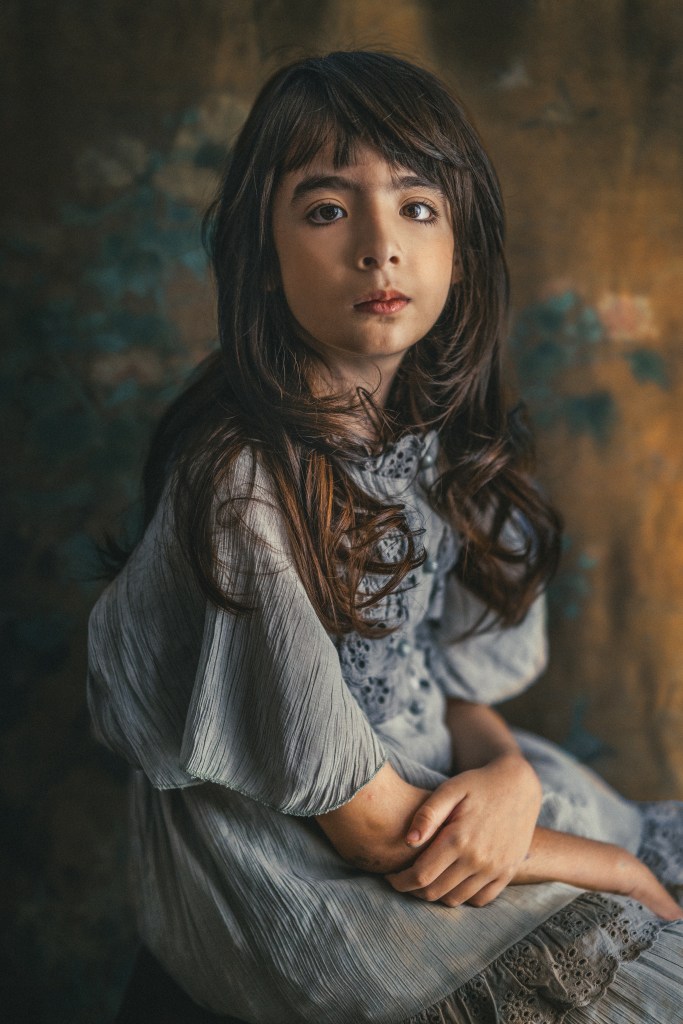
- Set Up the Main Light: Position the light source at a 45-degree angle from the subject. Experiment with the height and distance to achieve the desired look. Closer positioning will create more pronounced shadows, while moving it farther away will produce softer shadows. Observe the impact of the light on your subject’s face and make adjustments accordingly.
- Consider the Lighting Pattern: The lighting pattern greatly influences the mood and emphasis of your portrait. The most commonly used pattern is the Rembrandt lighting, characterized by a triangular-shaped highlight on one cheek and a shadow on the opposite side. Experiment with different patterns, such as split lighting or butterfly lighting, to create diverse effects.
- Add a Reflector for Fill Light: To reduce harsh shadows and fill in the shadows on the opposite side of the main light, incorporate a reflector. A white foam core board or a purpose-built reflector can bounce light back onto the subject, providing a subtle fill and enhancing overall illumination. Place it opposite the main light at a suitable angle.
- Control the Light Intensity: Achieving the desired exposure and contrast is essential in portrait photography. Adjust the light’s power or distance to control its intensity. You can also use light modifiers like grids or diffusers to fine-tune the light’s spread and avoid unwanted spill. Experimentation and careful observation will help you achieve the desired lighting balance.
- Mind the Background: While focusing on lighting your subject, don’t overlook the background. Ensure it complements the mood and enhances the overall composition. Experiment with different background options, such as solid backdrops, textured walls, or environmental settings, to add depth and visual interest to your portraits.
- Direct the Subject’s Pose and Expression: While lighting plays a significant role, posing and expression are equally important. Direct your subject to find flattering angles and positions that accentuate their features. Encourage them to relax, be themselves, and convey genuine emotions. A well-lit portrait combined with an authentic expression can create a powerful connection with viewers.
- Review and Adjust: Review your shots regularly and make adjustments as needed. Check for any unwanted shadows, reflections, or harsh highlights. Fine-tune the lighting, pose, or camera settings to achieve the desired effect. Pay attention to small details and take multiple shots to ensure you capture the perfect moment.
Mastering portrait lighting with a simple 1-light setup opens up a world of possibilities for creating professional-looking portraits. Remember, practice is key. Embrace experimentation, learn from your results, and adapt your techniques to suit different subjects and desired outcomes. With time and dedication, you’ll develop a keen eye for lighting, transforming your portraits into captivating works of art.
So, grab your camera, set up your 1-light setup, and embark on a journey to create stunningly lit portraits that truly shine!

Leave a comment